| home Java Script MS Access Perl HTML Delphi C ++ Visual Basic Java CGIPerl MS Excel Front Page 98 Windows 98 Ms Word Builder PHP Assembler Link to us Links |
Using Proofing Tools with Excel 97
What you will learn from this lesson
With Excel 97 you will:
What you should do before you start this lesson
Exploring the lesson
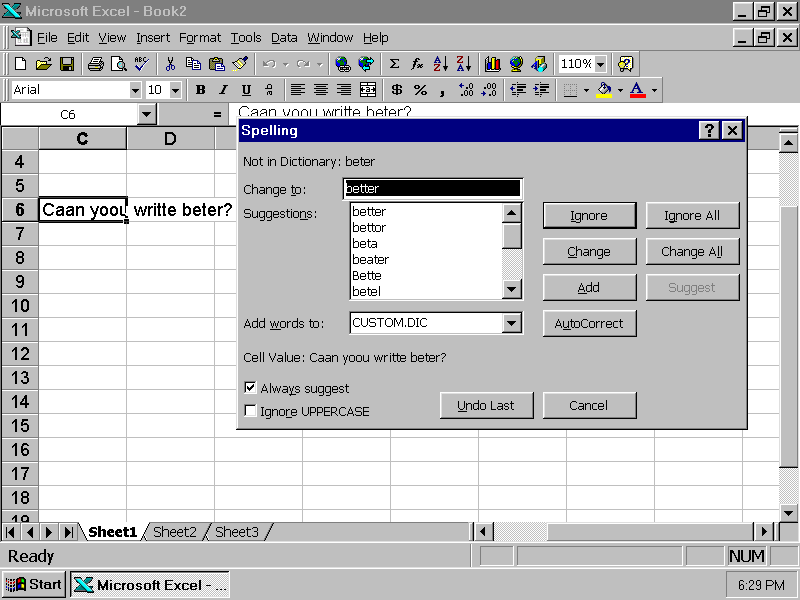
Using Excel 97, you can improve your worksheets and graphs with spelling and AutoCorrect functions. In the following exercises, you can check your spelling and your formula writing by entering wrong information, allowing Excel 97 to “fix” your errors, and then observing the results.
Checking your spelling
Identifying and correcting your spelling errors
- or -
Type the correct word.
Proofing formulas
Entering a wrong formula, or even part of a wrong one, will affect your calculations. Excel 97 will notify you when you have entered something that will not work.
Understanding formula error values
Excel 97 displays an error value in a cell when you have entered a formula incorrectly. Error values always begin with the number sign (#).
Correcting formulas
How you can use what you learned
Worksheets often contain text in titles and cells. You can use the spelling checker in Excel 97 to identify misspellings and prevent embarrassing mistakes. You can also use the spelling feature to correct graph titles and X-axis and Y-axis titles.
Office Assistant can suggest solutions to many of your problems. It opens the online Help feature of Excel and lists many subjects of interest.
Extensions
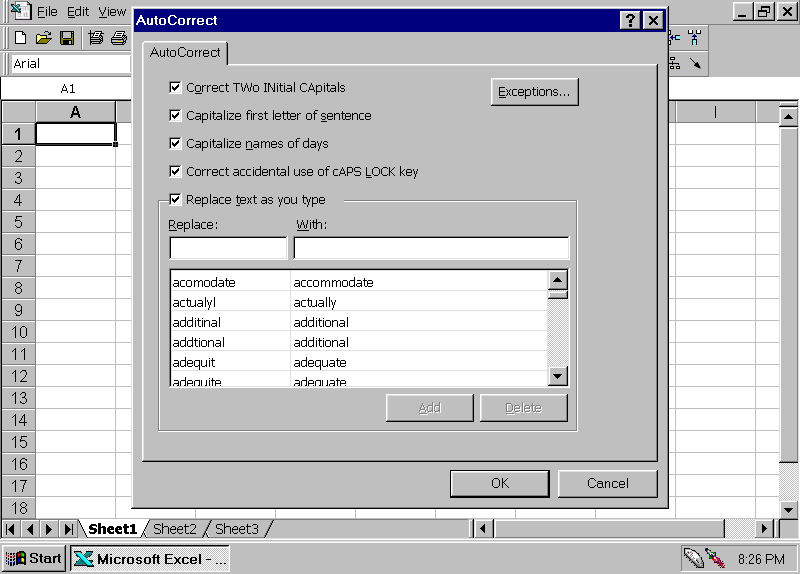
Many students are good spellers, but sometimes they consistently misspell certain words. For these few specific words, use the AutoCorrect feature of Excel 97 to anticipate and solve the spelling concerns. As you enter the specific word incorrectly, Excel 97 changes it for you. You can even enter those words that most often get tangled. By using the AutoCorrect feature in Excel 97, you and your students can avoid embarrassing mistakes on your charts and graphs.
Finding and correcting spelling errors with AutoCorrect
AutoCorrect makes the correction as soon as you finish typing the misspelled text and begin typing the next word or punctuation mark.
Using AutoCorrect
Summarizing what you learned
In this chapter you have explored and practiced: