
| home Java Script MS Access Perl HTML Delphi C ++ Visual Basic Java CGIPerl MS Excel Front Page 98 Windows 98 Ms Word Builder PHP Assembler Link to us Links |
Starting FrontPage 98 as a Beginner
What you will learn from this lesson
With FrontPage 98 you will:
What you should do before you start this lesson
Exploring the lesson
Starting FrontPage 98
The FrontPage Explorer and the FrontPage Editor make it easy for you and your students to create a Web site. In the FrontPage Explorer you create the structure or layout of your Web site, apply graphical themes to its pages, organize its files and folders, import and export files, test and repair hyperlinks, track tasks, and launch the FrontPage Editor to design and edit the contents of your Web pages. When your FrontPage Web is completed, you use the FrontPage Explorer to publish it on your computer, your organization’s intranet, or the World Wide Web.
In the FrontPage Editor you create, design, and edit World Wide Web pages. As you add text, images, tables, form fields, and other elements to your page, the FrontPage Editor displays them as they would appear in a Web browser. Although it is a powerful tool, the FrontPage Editor is easy to use because of its familiar, word-processor-like interface. You do not need to learn Hypertext Markup Language (HTML) to use the FrontPage Editor because it creates all the HTML code for you. You can click the HTML tab at the bottom of the page to view the code, and then click Normal to get back to your page.
When you start FrontPage, the FrontPage Explorer opens up. The Getting Started dialog box is the first thing you see when you open FrontPage 98.
Creating a new FrontPage Web using a wizard
You can use a template or a wizard to save time. There are several decisions you need to make to personalize your Web. Read through each screen, and select your choices. If you do not complete this process, the Web will not be saved. Continue through each screen until you reach the Finish button.
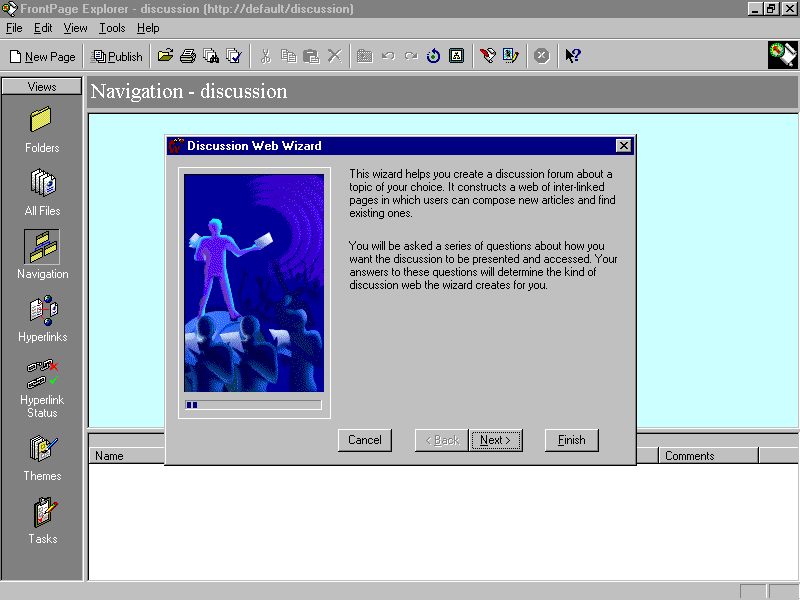
The Web wizards include the Discussion Web Wizard, which creates a discussion group with a table of contents and postings on a single topic.
Using a Web wizard
Creating a new FrontPage Web using a template
The templates contain professionally designed page layouts you can use to quickly create great-looking pages—just add your content.
The Web templates include Customer Support, Personal, Project, and Empty Web. Continue to use the FrontPage Explorer to create the next Web.
Creating a Web using a template
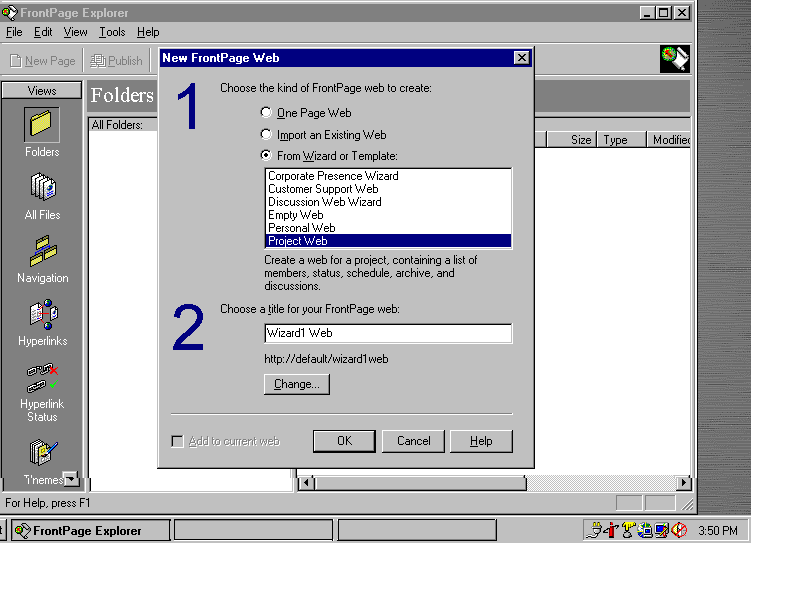
Creating a new FrontPage Web
You are presented with many options when you start FrontPage. You can create a new Web from the Getting Started dialog box or from the menu bar. You can also open an existing Web file. This lesson begins on the Getting Started dialog box that is open at the end of the previous lesson.
Creating a new Web from the Getting Started dialog box
Opening an existing Web
Opening a Web page in the FrontPage Explorer
Exploring the FrontPage window
Finding your way around the FrontPage Explorer is easy once you know the location of folders and files and the navigational techniques. The FrontPage Explorer shows you seven different views of the current FrontPage Web.
You can switch between these views by clicking buttons on the Views toolbar or using the View menu. Use the FrontPage Explorer to create and open FrontPage Webs, set permissions, create a navigation structure, manage folders and files, view and repair hyperlinks, use themes, and create and manage tasks.
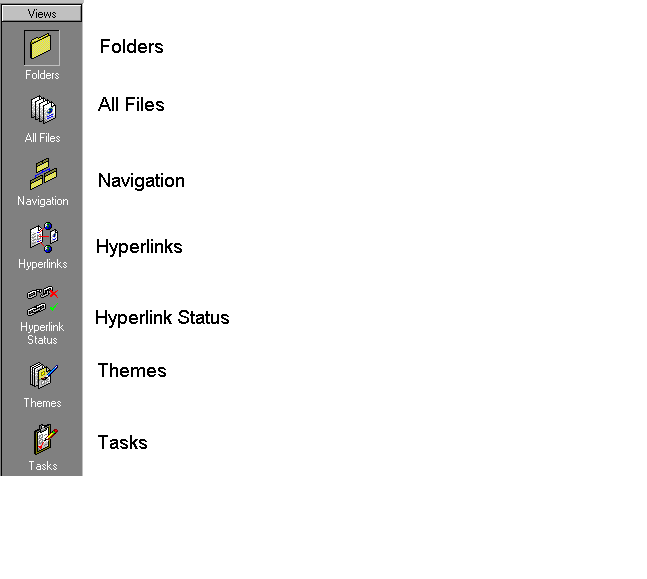
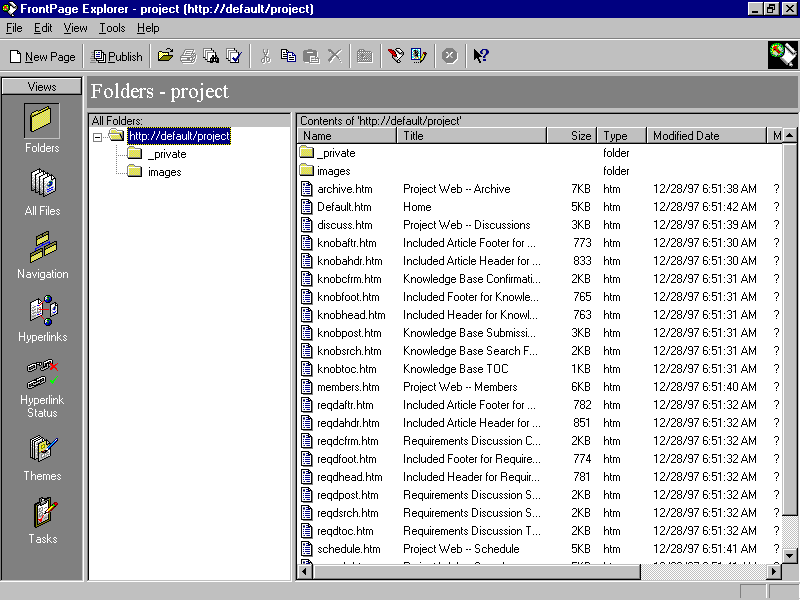
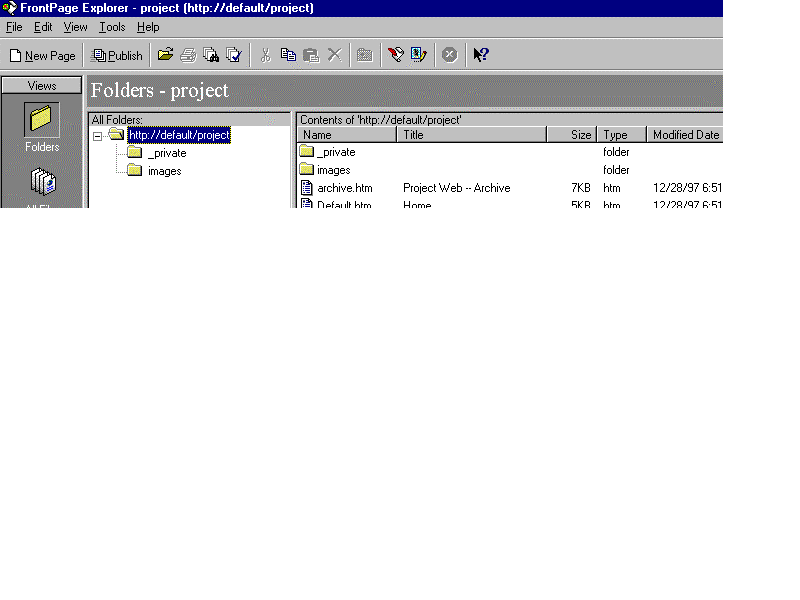
Exploring the Folders view
Folders contain the organization of the contents of files and folders in the Web. You can create, delete, copy, and move them in the Folders view.
Exploring the Folders view
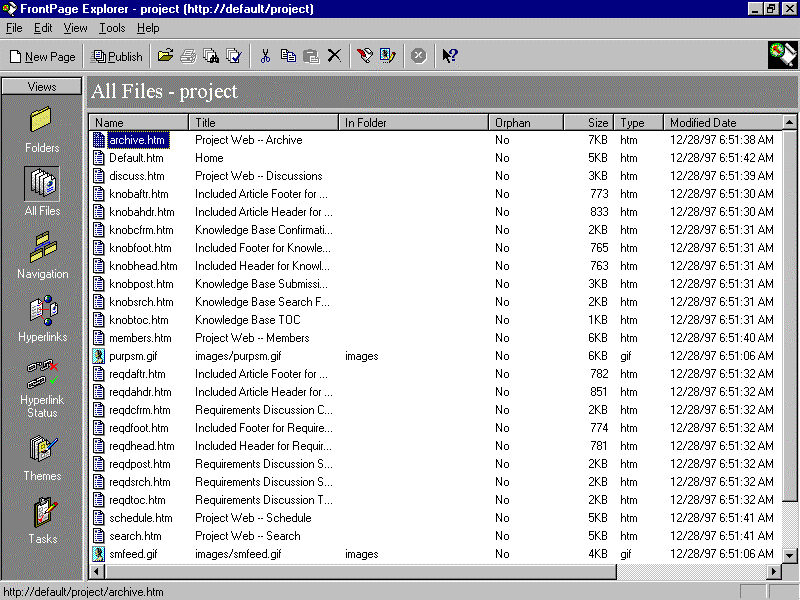
Exploring the All Files view
All Webs contain a list of files in the project’s folders. The list provides information such as file names, sizes, types, and modification dates.
Exploring the All Files view
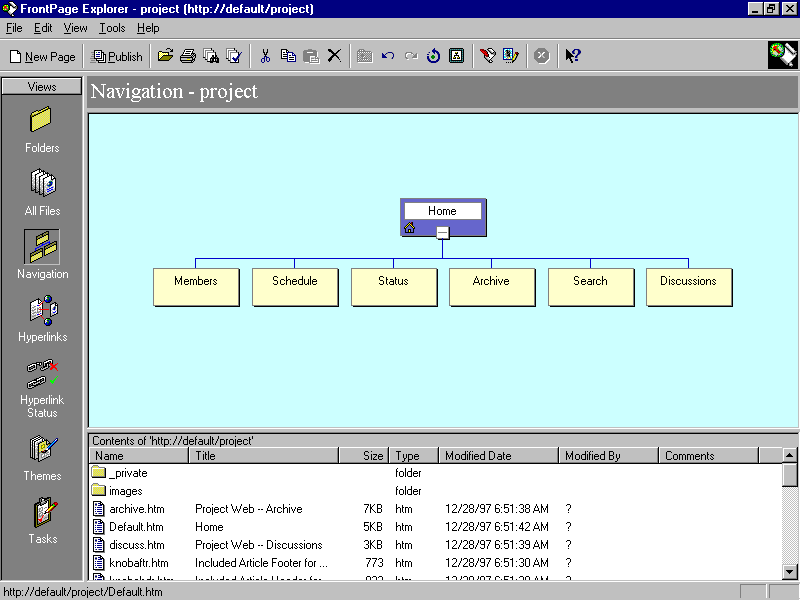
Exploring the Navigation view
The Navigation view shows how your Web is designed. A split window shows boxes that represent pages in one pane and folders and files in the other pane. You can create, display, and print this Web structure. If there are two or more page boxes in the top pane, you can move them by dragging them to where you want them. If there is more than one page box, you can click the plus sign (+) in the Home page box to open it; if there is a minus sign (–), click it to close the Home box.
Exploring the Navigation view
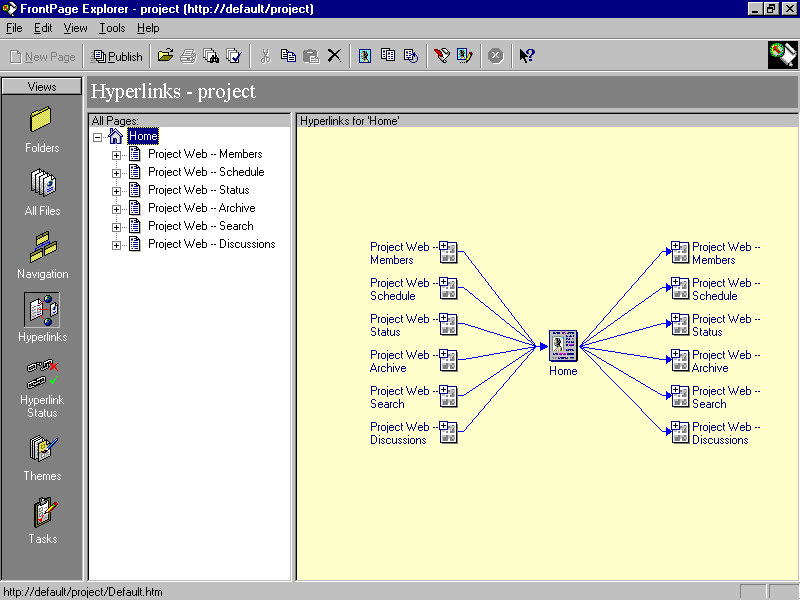
Exploring the Hyperlinks view
In the Hyperlinks view, you can view the Web pages in the left pane and the hyperlinks in the right pane. The page graphically displays hyperlinks between pages, between files in your FrontPage Web, and from your FrontPage Web to other sites on the World Wide Web. Use the Hyperlinks to Images button to view hyperlinks to graphics on pages.
Exploring hyperlinks
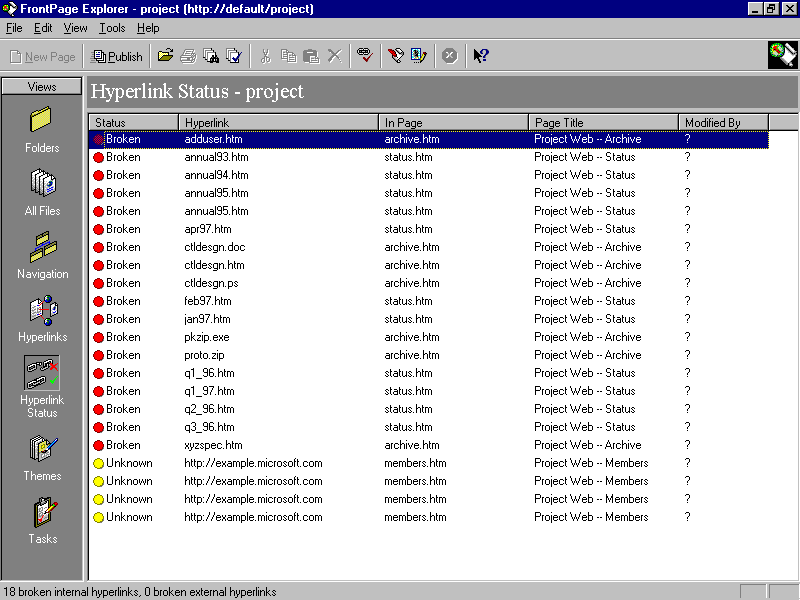
Exploring the Hyperlink Status view
The Hyperlink Status view displays a list of internal and external hyperlinks and indicates whether they are verified, broken, or unknown.
Exploring hyperlink status
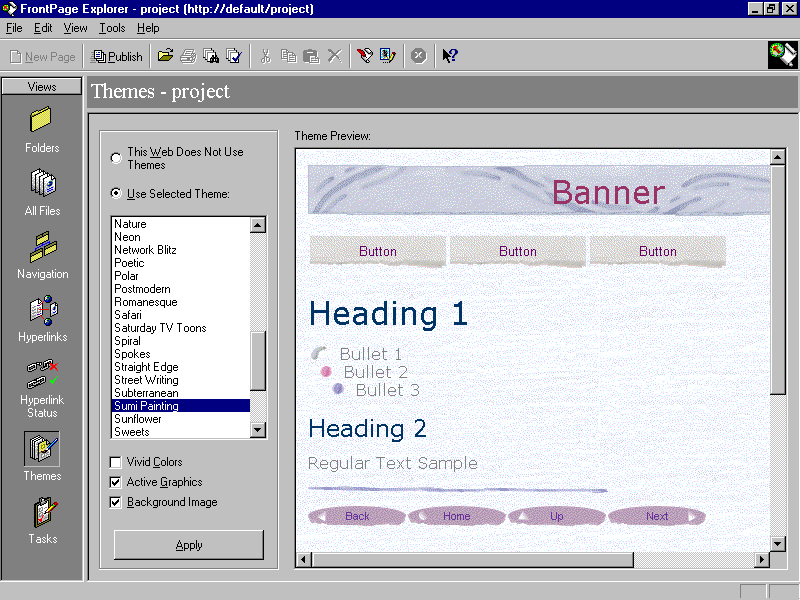
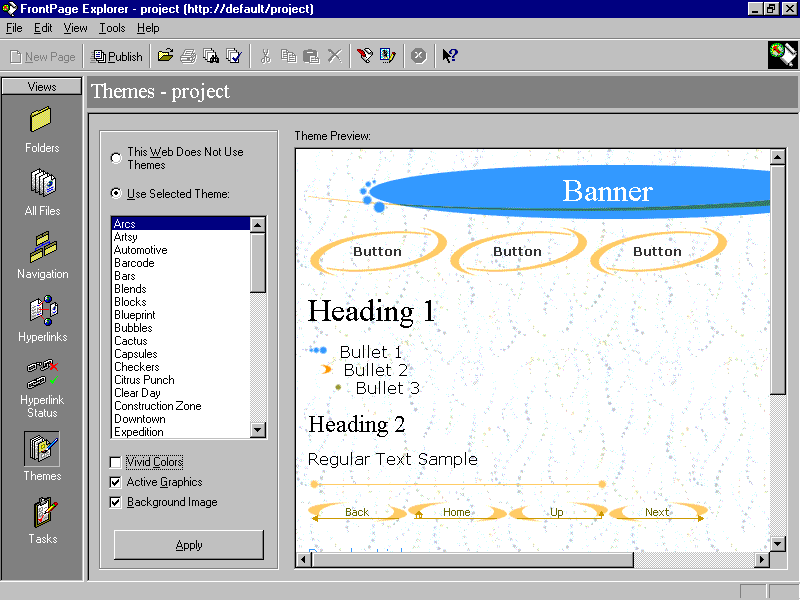
Exploring the Themes view
In the Themes view you add graphic page elements, such as bullets and backgrounds, to your FrontPage Web. You can choose from a gallery of FrontPage themes, and apply them to specific pages or to an entire FrontPage Web to give your site a consistent, professional appearance and navigational structure.
Using themes to enhance your Web
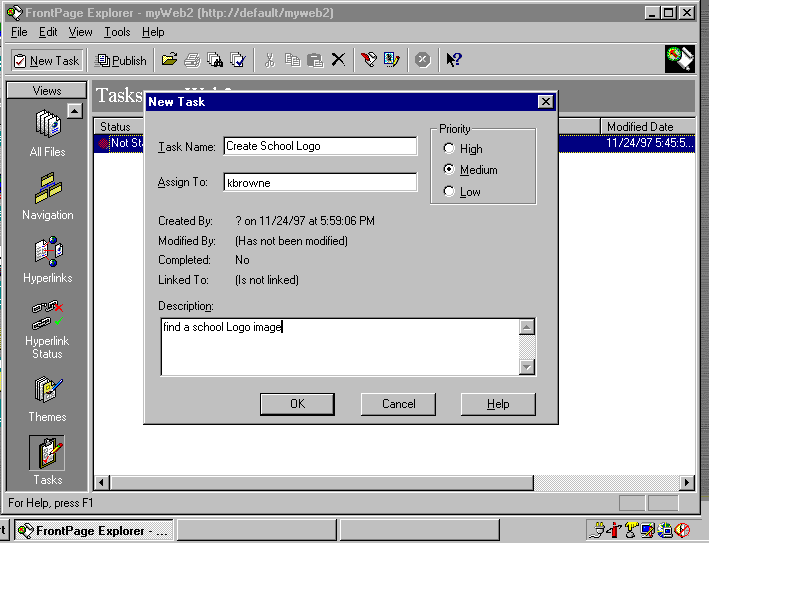
Exploring the Tasks view
The Tasks view helps you create and track a list of tasks to be performed in your FrontPage Web. You can create new tasks, assign them to specific pages, and track their progress. Use this view to display the status of Web tasks before you publish your FrontPage Web.
Exploring a task
Exploring the FrontPage Standard toolbar
Use the Standard toolbar to transfer to the FrontPage Editor and Image Editor. The Standard toolbar contains the most commonly used New Page, Publish, Find, Spell commands; as well as commands for Cut, Paste, Delete, and Help.
Exploring the Standard toolbar in FrontPage Explorer
Exploring some toolbar options
How you can use what you learned
You can set up home pages that serve a number of purposes for schools. Decide on the purpose of the Web in order to determine how to set up and organize it. You can create a Web to serve as information links between students, parents, and people in the community, or as sites for students to display their work or to search for information. There are wizards and templates in FrontPage 98 that can help you explore other possibilities.
Extensions
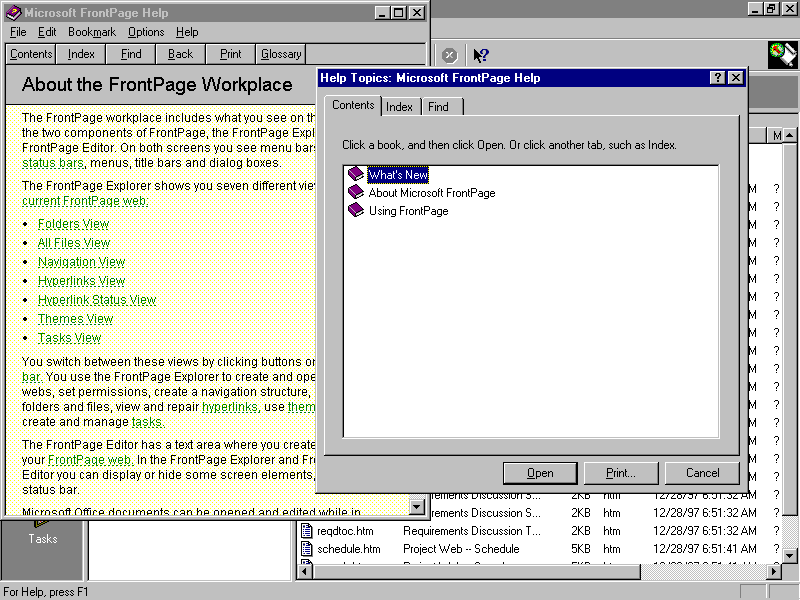
Exploring FrontPage Help
Use the Microsoft FrontPage Help command to display online Help. There are three parts: Contents, Index and Find. Contents is like a table of contents where help is organized by chapters and subtopics. In Index and Find, you type keywords that you want to find.
Viewing contents to explore FrontPage 98 Help
Viewing FrontPage contents in FrontPage Explorer
Using the Index to explore FrontPage 98 Help
Viewing the FrontPage index
Using the Find tab to explore FrontPage 98 Help
Using Find in FrontPage Help
Quitting FrontPage 98
Always follow the proper procedures to quit FrontPage.
Quitting the FrontPage Explorer and Editor
– or –
Press alt+f4.
Summarizing what you learned
In this chapter you have explored and practiced: