rowebcool
Displaying Information with FrontPage 98
What you will learn from this lesson
When you display information with FrontPage 98 you will:
- Create a table.
- Create a frame.
- Create a form.
- Explore the Discussion Web Wizard.
What you should do before you start this lesson
Start Microsoft FrontPage 98.
Exploring the lesson
Creating a table
Tables display information in a side-by-side format, in rows and columns. Each block of information is called a cell, which can consist of text, images, lists, and other tables with information from telephone numbers to spreadsheets. FrontPage 98 has many templates for tables.
Creating a table in the FrontPage Editor
Creating a table for your school Web
- Open the washingtonhigh Web in the FrontPage Explorer, and on the Views toolbar, click Navigation.
- Double-click the Staff Information page.
- Position the insertion point where you want to insert the table on the page.
– or –
Click at the top, below the header, and press enter three times.
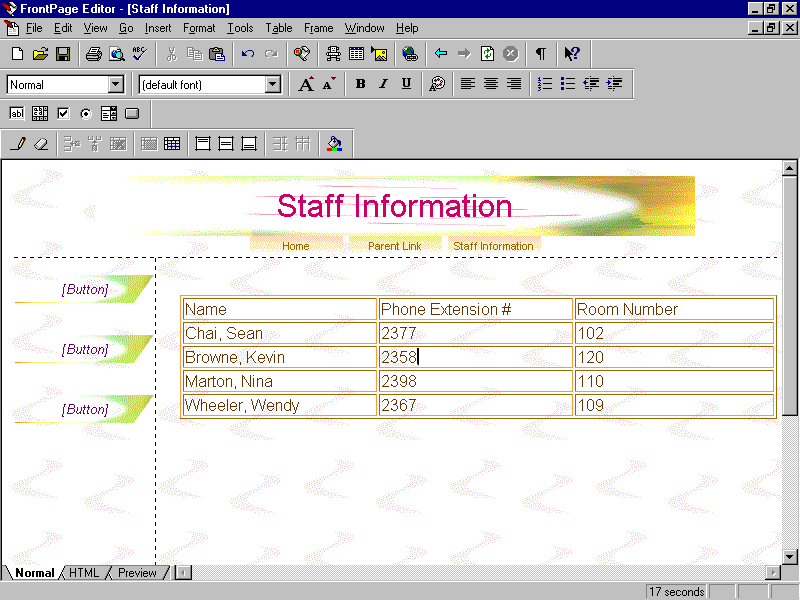
- On the Table menu, click Insert Table.
- In the Insert Table dialog box, under In Size, type 5 in the Rows box.
- Type 3 in the Columns box.
- Click OK.
- Enter the following information in the table.
|
Name |
Phone Extension # |
Room Number |
|
Chai, Sean |
2377 |
102 |
|
Browne, Kevin |
2358 |
120 |
|
Marton, Nina |
2398 |
110 |
|
Wheeler, Wendy |
2367 |
109 |
The Staff Information page will look like the example that follows.
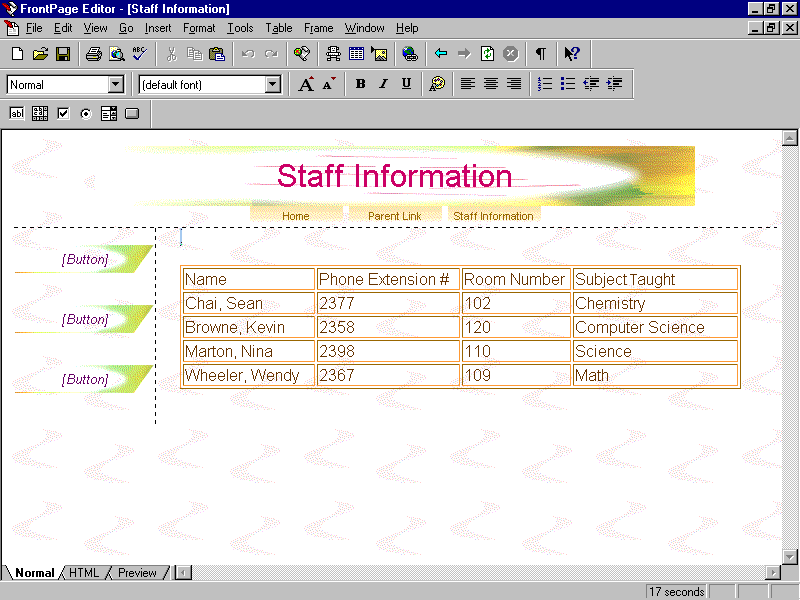
Creating new cells
You may want to create new cells to add to an existing table.
Creating new cells
- Working in the FrontPage Editor, on the View menu, click Table Toolbar.
- On the Table toolbar, click the Draw Table button. The mouse pointer becomes a pencil.
- With the pencil, in the top right cell draw a vertical line from the right of Room Number down through the bottom cell, so that you “cut” the column in half.
- On the Table toolbar, click the Draw Table button.
- Place the mouse pointer on the line between the Phone Extension # and Room Number columns.
- When the double-arrow (Ö
) appears, click, and drag the column border to the left.
- Using the double-arrow, resize all the columns to make them equal.
- In the first cell of the new column, type Subject Taught.
- Type Chemistry, Computer Science, Science, and Math in each consecutive cell under Subject Taught.
Creating a frame
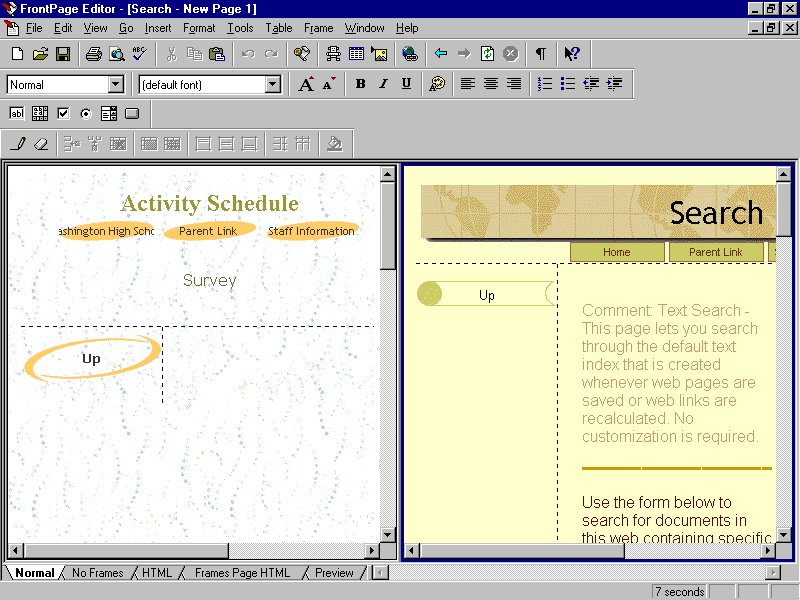
Frames provide ways to display Web pages. The page can be divided into containers located side by side. Each frame can display a different page. You may place many frames in a frame layout document. The frame page contains hyperlinks to existing pages displayed in the frames.
Creating frame pages on the home page
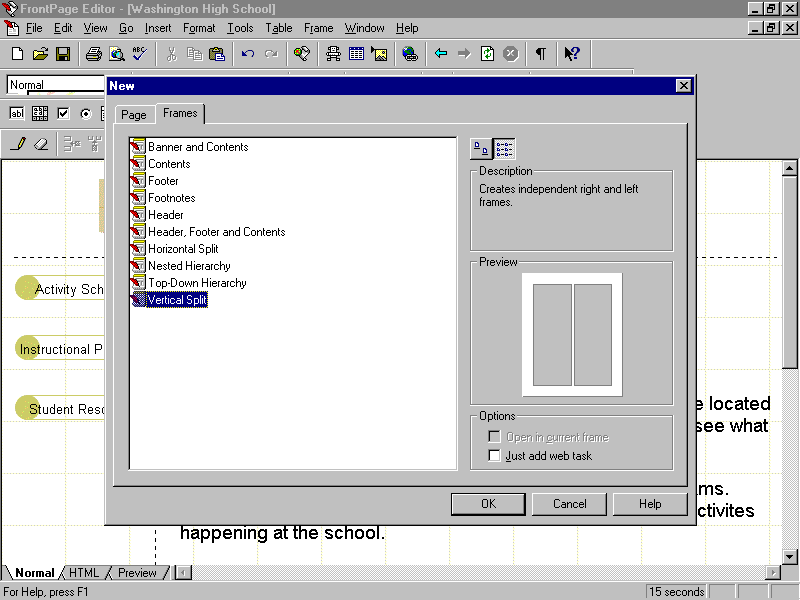
Creating vertical split frames
- Return to the home page, and on the File menu, click New.
- In the New dialog box on the Frames tab, click Vertical Split.
- Click OK.
In the left frame, click Set Initial Page.
In the Create Hyperlink dialog box, click newpage1.htm, and click OK.
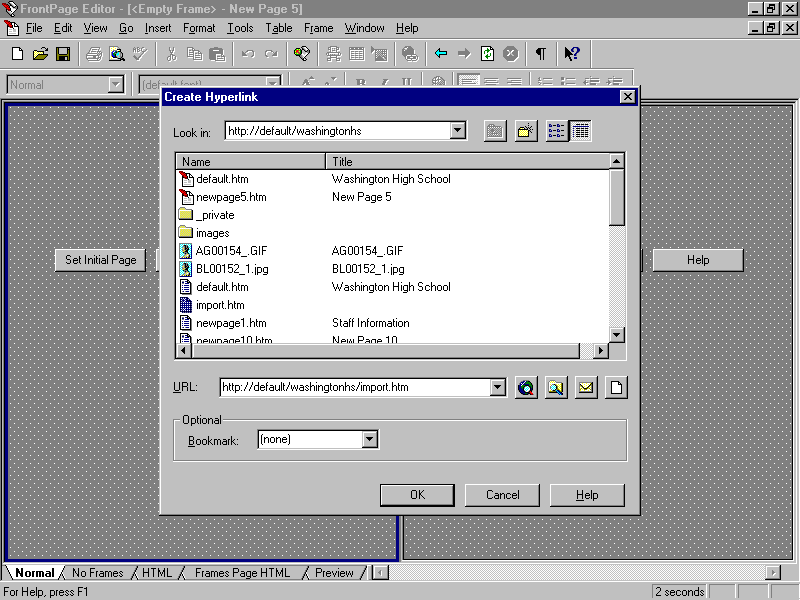
In the right frame, click Set Initial Page.
In the Create Hyperlink dialog box, click search.htm, and then click OK.
Position the pointer on the vertical line between the two frames, click, and drag the vertical line ½ inch to the left.
On the File menu, click Save.
In the Save As dialog box in the URL text box, type verticalpage.htm.
In the Title text box, type VerticalFrame.
Click OK.
Creating a form
Using FrontPage 98, you can create a form that contains text, tables, images, and other information. Forms can be organized to include bulleted lists, text areas, pop-up menus, buttons, check boxes, labels, and scrolling text boxes. The form you create in the following lessons will use buttons.
Opening the page
Opening the page
- Return to the FrontPage Explorer.
- Open toppage1.htm, the Parent Link page.
- Press ctrl +click on the Survey link.
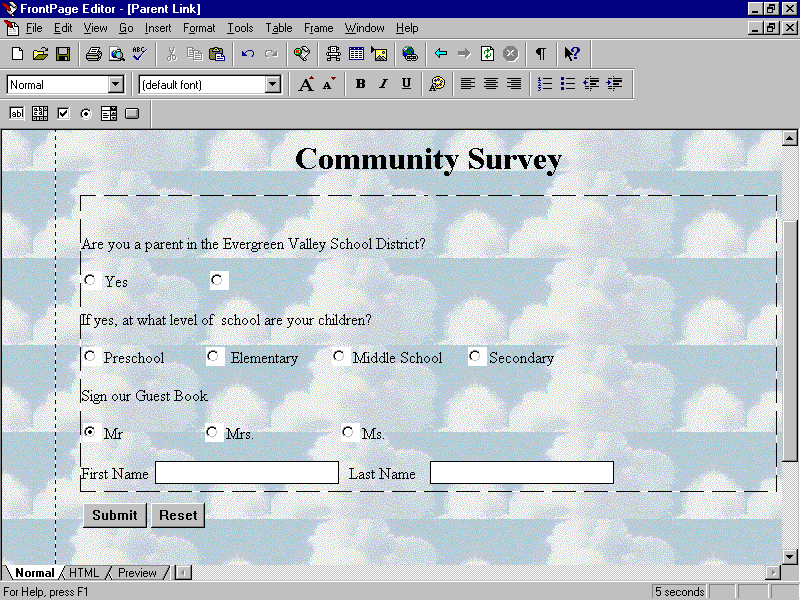
Creating a form
The form includes a title and three questions.
Formatting a form title
- Type Community Survey on the first line, and select it.
- On the Format toolbar, click the Bold button.
- On the Format toolbar, click the Increase Text Size button three times.
- On the Format toolbar, click the Center button.
- Click below Community Survey, and press enter.
- On the Format toolbar, click the Align Left button.
Creating the first survey question
- On the Format toolbar, click the Decrease Text Size button three times.
- On the View menu, click Forms Toolbar.
- On the Forms toolbar, click the Radio Button.
- Click in front of the radio button you just inserted, and press enter to move the buttons down so you can type in the box.
- Press the up arrow key, and type Are you a parent in the Evergreen Valley School District?
- Click between the radio button and the Submit button, and press enter.
- Click after the radio button, and type Yes.
- Press tab several times. On the Forms toolbar, click the Radio Button.
- Type No after the button, and press enter.
Creating the second question
- Type If yes, at what level of school are your children?, and press enter.
- Click the Radio Button, type Preschool, and press tab.
- Click the Radio Button, type Elementary, and press tab.
- Click the Radio Button, type Middle School, and press tab
- Click the Radio Button, type Secondary, and press enter.
Creating the third question
- Type Sign our Guest Book, and press enter.
- Click the Radio Button, type Mr., and press tab twice.
- Click the Radio Button, type Mrs., and press tab twice.
- Click the Radio Button, type Ms., and press enter.
- Type First Name:
- On the Forms toolbar, click the One-Line Text Box button.
- Press tab twice, type Last Name: and then click the One-Line Text Box button.
- On the View menu, click Forms Toolbar to hide it.
- Save your page, and quit the FrontPage Editor
- In the FrontPage Explorer, close the washingtonhigh Web.
How you can use what you learned
You can use tables to organize information gathered from your Web or from any source. Forms provide an easy way to display text, images, tables, and other information. Using FrontPage 98, you can create questionnaires that can be used in the classroom in student research activities, or out of the classroom in community surveys and polls. You can gather this information by incorporating password fields, buttons, text fields, pop-up menus, and check boxes.
Extensions
Exploring the discussion Web
The discussion Web creates a discussion group with a table of contents and postings on a single topic. The discussion Web uses a combination of forms and frames.
Reviewing the discussion Web
Opening the discussion Web
- In the Getting Started dialog box, Open an Existing FrontPage Web, and then click Discussion.
- Click OK.
- Double-click Default.htm, the FrameSet for Discussion.
Previewing in the browser
- In the FrontPage Editor, on the File menu, click Preview in Browser.
- In the Preview in Browser dialog box, click Preview.
- Click the Post a new article link.
- In the Subject text box, type The Impact of School Reform.
- In the From text box, type School Magazine.
- In the Comments text box, type The article reviewed school reform issues in Your City in the past ten years and their impact on standardized test scores.
- Click the Post Article button.
- On the View menu, click Refresh.
- Click the Search the articles for a word or pattern link.
- Type reform in the Search for text box.
- Click the Start Search button.
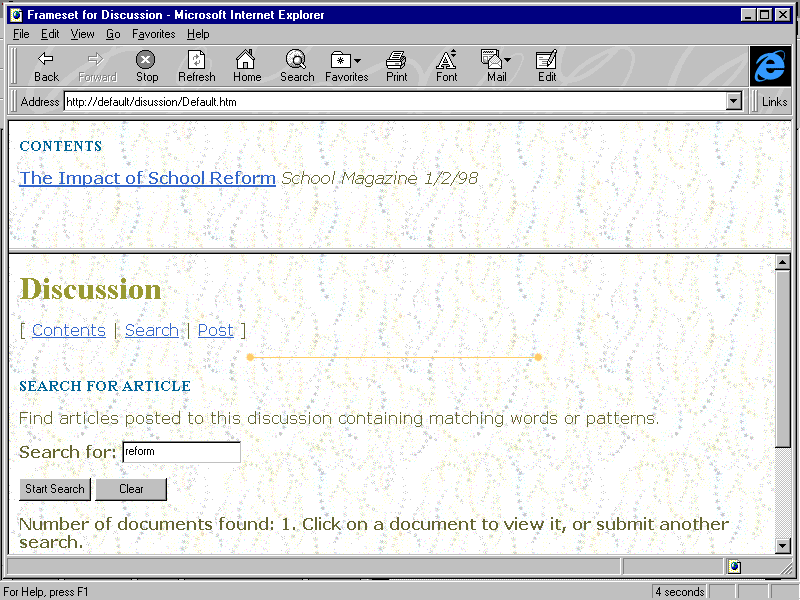
Under Search Results (you may have to scroll down to see it), click The Impact of School Reform to view the contents.
On the File menu, click Close.
Save the discussion Web.
Quit the FrontPage Editor and the FrontPage Explorer.
Summarizing what you learned
Creating a table.
Creating a frame.
Creating a form.
Exploring the discussion Web.